How to Get the Most Out Of Your Seed Paper: 3 Easy Steps
Jan 18, 2021
So you’ve received a card that comes with plantable seed paper shapes. Or maybe you’ve seen seed paper packaging popping up online or in stores. “Such a cool idea!” you say. “Can’t wait to try it out.” But then you get home and that seed paper goes into a drawer along with all those other odds and ends. “I’ll try growing it one day”, you tell yourself. One day. Well, we are here to tell you to get that seed paper out and start planting right now! You don’t need a green thumb and it really is easier than you may think. But first...
What is seed paper?
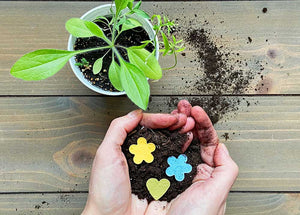
Seed paper (also called plantable paper) is a biodegradable paper that is embedded with various kinds of seeds. When the paper is planted, the seeds can sprout and the paper composts away into the soil. The result is beautiful plants with zero waste!
Our seed paper material is sourced from a supplier that uses post-consumer materials to make the paper (which means it's totally tree-free) and embeds it with high quality non-GMO seeds. The wildflower mix is carefully curated to include native species, which encourage habitats for bees and butterflies. Now that’s an eco-friendly paper!
Now that we've got the lowdown about seed paper, let's get down to the nitty gritty! Here are some simple steps along with important tips that will help you succeed in growing your seed paper.
Step 1 - Gather Supplies

Get some basic supplies. You’ll need a pot or container, ideally with a drainage hole in the bottom. This will help you not to over-water your plants. Next you’ll need some potting soil. Nothing too fancy, but you’ll have more success with nutrient rich soil than just grabbing some dirt from your yard. Lastly, grab that seed paper! If you have seed paper shapes, they are already a good size to plant. If you have a sheet or large piece of seed paper, just tear it up a bit into smaller pieces.

Now you have all your supplies ready to go!
Step 2 - Assemble

Fill your pot about ¾ full of soil. Light press the soil so it’s a tad firm, but not packed down. Now place your seed paper pieces on top. Space them apart a bit so they are not overlapping. How much seed paper you can fit depends on the size of your pot. Now cover the seed paper with a thin layer of soil- about ⅛ of an inch. Lightly pat down this top layer again.
Next, you need to thoroughly water these babies, until the soil is damp. DO NOT drench your soil. Just a good watering.

Step 3 - Location, Location, Location

Find the sunniest place in your house for this pot. I like to put mine on a windowsill where I know they'll get the most sun. Now your job is to water regularly until you see sprouts appear. This means keeping that spoil moist! This is especially important for the first 10 days while the seeds are germinating. Shortly after, you should see some delicate little green seedlings appear. Stop everything, and do a happy dance! Now continue to water regularly. I like to use a spray bottle of water to lightly mist them. They are so delicate and tiny at this stage.
Now it’s all about maintenance and watching them grow. Once the plants get stronger, water as needed and wait for those beautiful blooms to appear!

Additional tips:
- If planting your seed paper outside, wait until the temperature and conditions are appropriate. Typically, spring is the best time to plant wildflower seeds outside. As with indoor sowing, find a sunny location and water regularly.
Note: If you started sowing your seeds indoors, you can move them outside when the conditions are favourable. This method is good for giving your seedlings a head start before going directly outside.
- Growing flowers from seeds, or any plant for that matter, takes patience. So don’t get discouraged if you don’t get immediate results. Sometimes seedlings can take longer to sprout. Also, if you are planting indoors, it can be a challenge to get them enough light. If your brightest window isn’t doing the trick, you can always opt for artificial or grow lights.
Sowing from seed is a rewarding yet sometimes challenging process. If you don’t succeed at first, try adjusting a few key elements like sun exposure and watering. It’s okay to make mistakes! With some extra patience and dedication, you will suc-seed! (Sorry, couldn't help myself...)
Have you found any tips helpful in growing from seed? Please share them with us in the comments below!
Explore our collection of greeting cards, or, check out our sets of greeting card bundles wrapped with a seed paper band!


